How I Enhance Images to Analyze for Paranormal Creepers
Before I get into the results of my paranormal photo analysis, I felt I should first devote a page to what it is I do and how anyone with a cellphone camera and a basic photo exposure editing application can replicate how I find the paranormal men with hats hidden in both the shadows and the light of a image. When I watch a video or see a photo someone has shared on a social media with a claim that there was some form of paranormality involved, I pull out my iPhone and take a look. I can also do this on my laptop, but I get the best results on my phone photo app. For whatever reason, the super-duper retina display on my MacBook tends to pixelate the details of most creepers and creeper situations. Also, I’ve never used any other cellphone brand, but I’ve spoken with someone who uses Samsung and they are able to get the same results using the same techniques with the similar software apps.
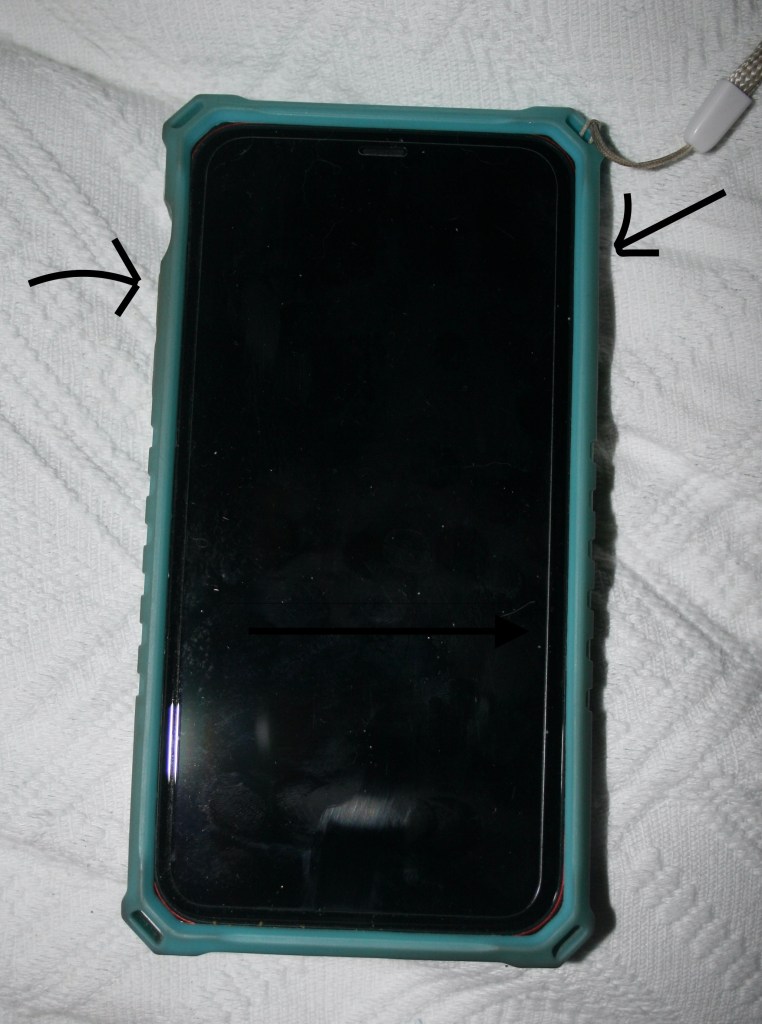
Okay, so the first thing to know is how to take a screenshot of a photo or video image. There are ways to save and copy images to the photo app, but I find the screenshot is the easiest as, on the phone, it doesn’t kick me out of whatever social media app I’m viewing in order to capture and then move the image into my photo library. The way to grab a screenshot on my iPhone 11 is to find the power button on the right side of the phone with the screen facing forward and the volume-up button on the left side of the phone. Push both buttons at the same time and the phone makes a camera “shutter” click, approximating the sound of taking a film image. There is a very slight delay from pushing the buttons to the shutter taking the shot, so it may take some practice to get a fast-moving object pinned down in a video. On YouTube, I go to the settings button and adjust the speed of the video to .25 speed, or a quarter of normal speed. If I miss the event, I just double tap the screen and the YouTube app will back up the video ten seconds and I try again. If I’m having trouble, I will rapid fire several screenshot clicks and delete any photos in the library that haven’t captured the moment I want to analyze.
Now, I go to the photo application that comes with iPhone 11. It’s called “Photos” appropriately enough. I hit the button for “All Photos” if it doesn’t open up that window automatically and then got to last images added to the library. I click on the photo I want to deconstruct and I’m ready to get started. At the upper right corner of the screen is the blue “Edit” button. I tap that with my finger, and the word “Adjust” comes up at the top of the screen, and it brings up the control bar at the bottom. The default is to auto, which is displayed at the bottom of the image with icons in circles directly below it. Below those icons is a measured bar that slides back and forth with your finger. Below the measure bar, a “Cancel” button, three other icon buttons, and a red “Revert” button at the bottom right of the screen. One final button that will come in handy is at the very top right of the screen; it is a white circle with three black dots. This button will take you to the “mark-up” option that allows me to draw and outline on the image. The anti-red eye button is beside that but I don’t use that for paranormal photo editing, so I won’t talk about it here.

The first thing I usually do is the get rid of any part of the image that is superfluous with the cropping tool. The crop tool is at the very bottom of the screen on the right and it looks like two overlapping right angles with two tiny arrows around it. Tap on that and a little yellow dot appears below it to let you know you’re using that function. A grid appears around your image with highlighted corners. Simply use your fingers to manipulate the grid to cut out any part of the image you don’t need such as borders. You can use two fingers to resize the image and, after you move the grid, the image will automatically resize itself after getting rid of anything you don’t need for your analysis. It hasn’t gone away entirely; it’s easy to use two fingers to reposition any part of the original image inside the work area and expand back to include stuff you might have cut out. That may change if you finish editing/cropping and hit the “Done” button. The red “Revert” button will reappear after you hit “Done” and it’ll allow you a do-over, but it will get rid of any other editing magic you did and you’ll have to start over. Once you’ve cropped the image down, look for the adjustment icon on the right at the very bottom of the screen and touch that.


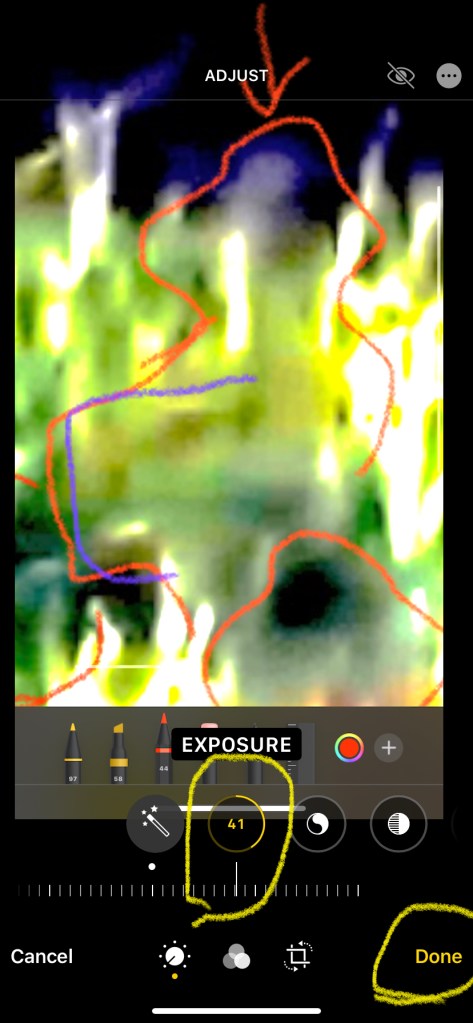
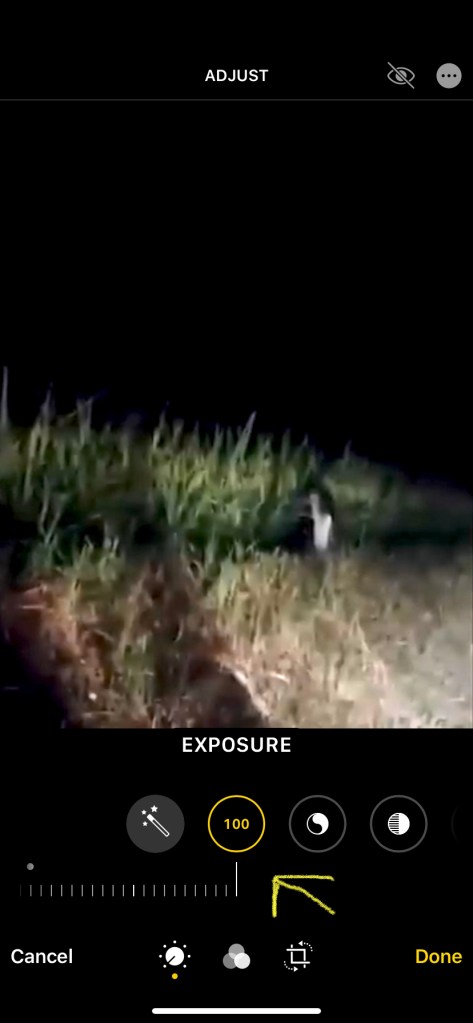
This allows you to change the exposure settings on the bar and icon above it. A little yellow dot appears on the adjust icon when you have it chosen and the next thing to do is to go to the icon bar just below the image that has a little plus/minus sign. Touch that and the word “Exposure” appears. The measure bar also lights up. The exposure function allows you to lighten or darken an image by sliding the measure bar back and forth. Push the bar to the left will lighten it, pushing to the left will darken it. There is a white dot at the original setting if you decide the initial exposure was the best to work with. The icon will light up with a yellow line around the perimeter of the circle to show where you are in relation to lightening or darkening with a negative sign for darker edits. Inside the circle is a numeric value of + or – percentage up to 100% of an exposure change as its limit. If the final result still isn’t light or dark enough, the way around that is to take a screenshot of what you have and use that new image as your baseline to add more light or darkness as you need. I call this “second” and “third” level analyses depending on how many times I re-take a screenshot away from the original to get the results I need.

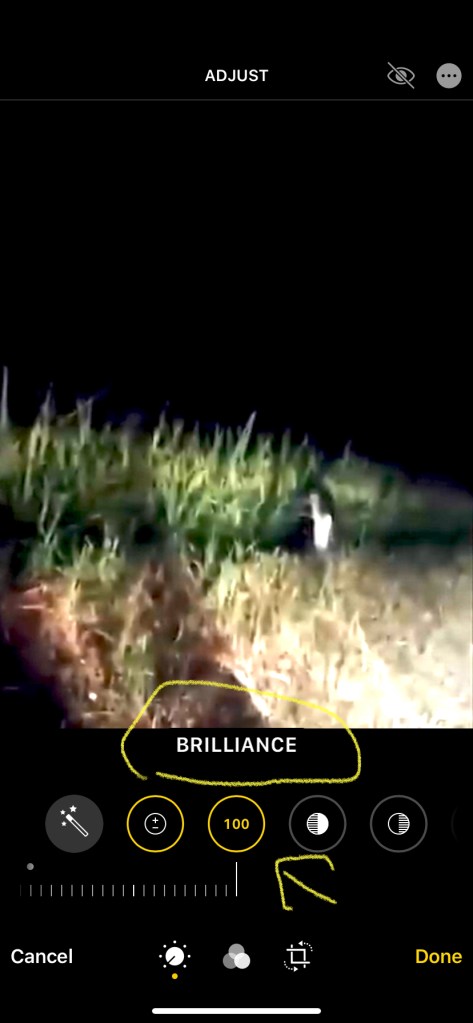
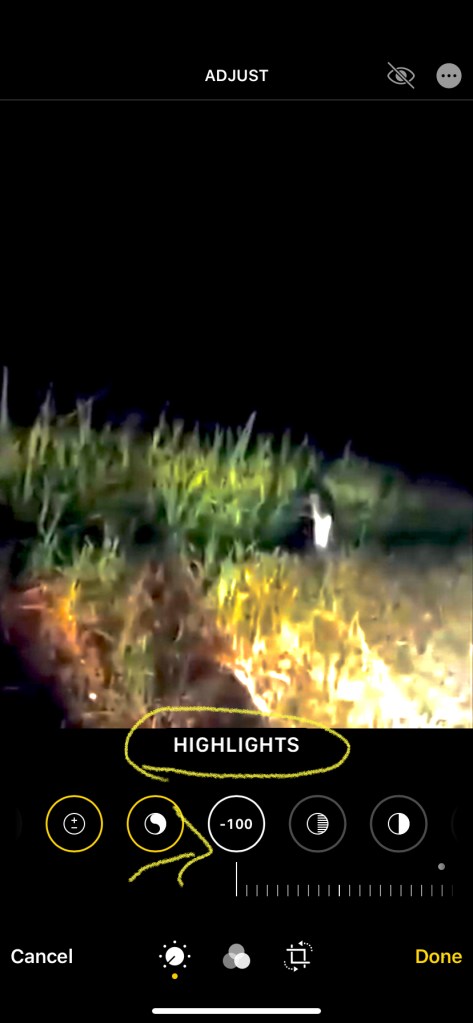
Now, I just work my way down the icons left on the adjustment bar, sliding the bar back and forth to see what manifests, if anything. “Brilliance” is the next adjustment and I go through the same process as I did with the “Exposure” adjustment. “Highlights” sometimes adds information, but often times it makes no difference although I will come back to it after I work all the way down the icons. Each image is unique as it will require different settings depending on how much light or darkness is in the original screenshot. I tend to go through each icon rather fast until I see a shadow or outline manifest where it wasn’t visible before. I usually stop at the color adjustments and only occasionally go past them to the “sharpness” and “definition” settings to draw out more detail. These final settings tend to pixelate the details and viewers will claim anything you believe to be paranormal (because you saw it manifest on the exposure settings) as the result of “matrixing” or “pareidolia.” After doing thousands of these analyses, I have developed a feeling for how much to push or pull the bar to bring out the creepers hidden in the shadows or invisible in the light of day.
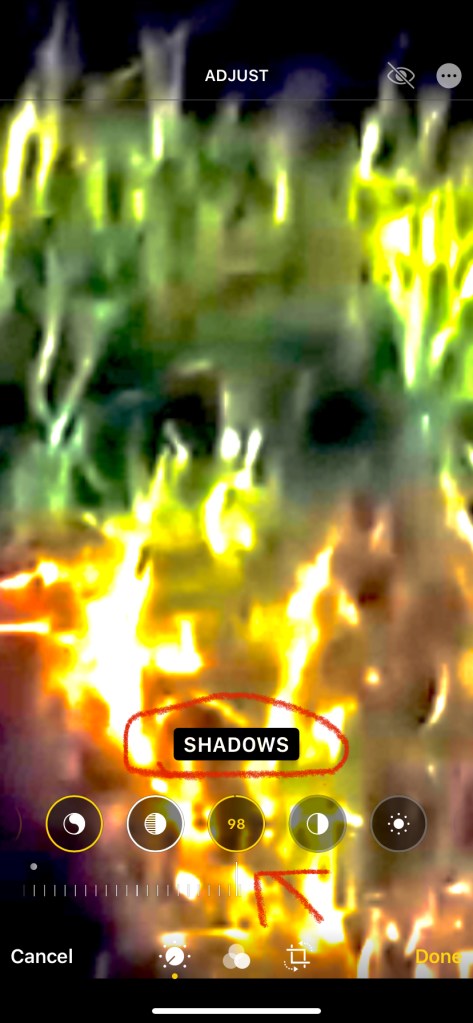
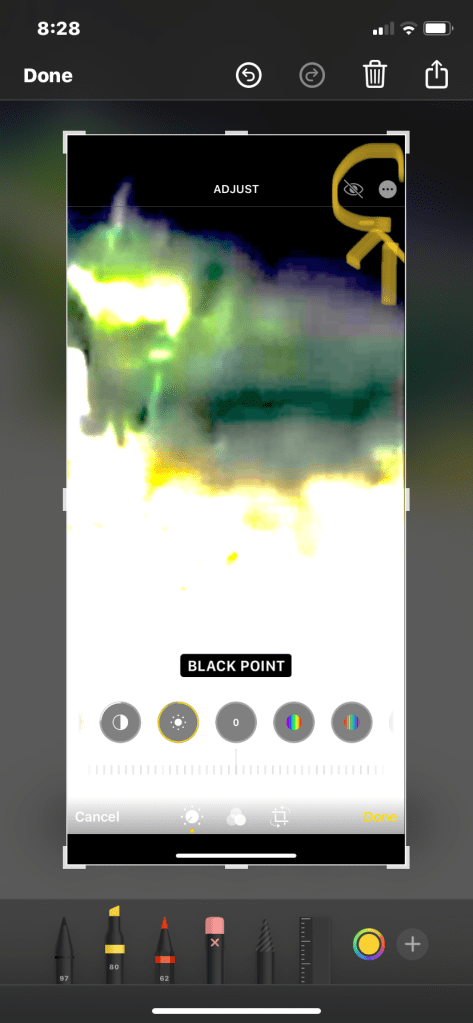
I’ve found that the “Contrast” setting along with the “Shadows” and “Blackpoint” are the most useful while “Brilliance” and “Highlights” are better for fine tuning the details. Sometimes I’ll try “Noise Reduction” on the far right along with “Definition” but, again, these tend to pixelate the details and make the overall image muddier instead of clarifying it.
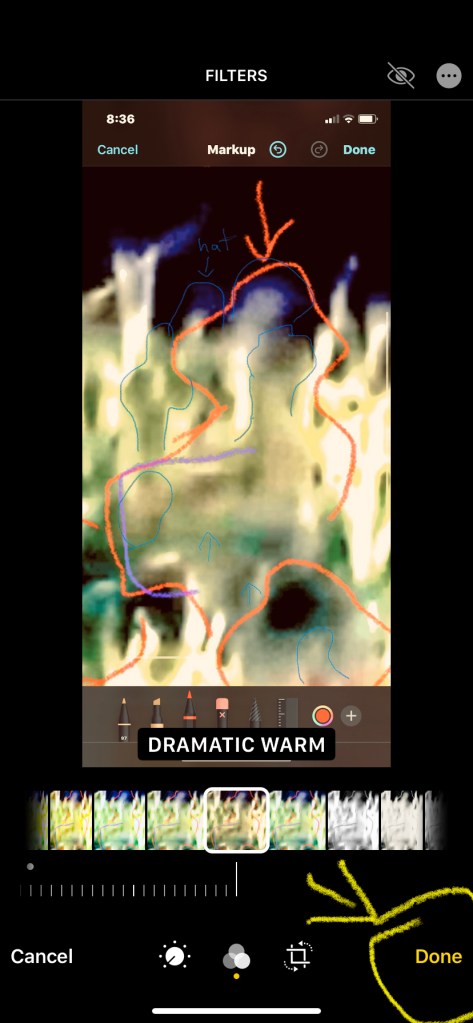
After going through all the exposure settings, I sometimes go to the “Filters” option on the very bottom of the screen in the center. It looks like three different gray-shaded, overlapping circles. Touch that and the yellow dot will appear beneath it, along with a string of images that you can slide through with preset exposure changes. The filters will change the overall look of the image from being more “dramatic” or “vivid” or “cool” to three different black-and-white settings. I often use the black and white settings to filter out colors in the original that are interfering with seeing the details of creepers I’ve found in the first round of edits. If I find a filter setting that gives better detail, I will set that and then go back to the exposure filters and add more light or darkness to make the subjects pop out.


Many times, the entities are layered over the top of one another. Trying to bring out the details of one entity by increasing the exposure oftentimes will make it fade out and an entirely different entity manifests beneath it. I’ve found that this layering effect is why the hat man creepers have a fuzzy, slightly out-of-focus appearance. It’s also why I agree with the hypothesis that these entities are interdimensional travellers as the layering effect is these other-dimensional creatures manifesting in the two-dimensional space of a photograph. I’ve also found a kind of “nesting” effect related to the layering in which when I try to bring out the details of a hat man’s eyes, it turns out the “eyes” are actually smaller hat men popping out of the larger one’s head. These iterations can go down multiple layers until there are more pixels of vague hat men than useful information. It can feel like going down Alice’s rabbit hole.
My suggestion is that, if there is a lot of layering, expand the image with your two fingers on the screen to isolate the entity that interests you and then take a screenshot of that. That will save it separately. Now, do the enhancements to bring out second and third layers as the first layer fades out, taking screenshots when an entity shows the most detail possible. Move to a different area of the image and zoom in/crop out details to focus on one detail (a particular hat man creeper) and repeat the process. I can often have twenty different versions of a single screenshot that highlight different areas and entities from the first image. If I take a bunch of screenshots of a particularly interesting video, I can end up with a hundred detailed enhancements of different entities and areas along the timeline.
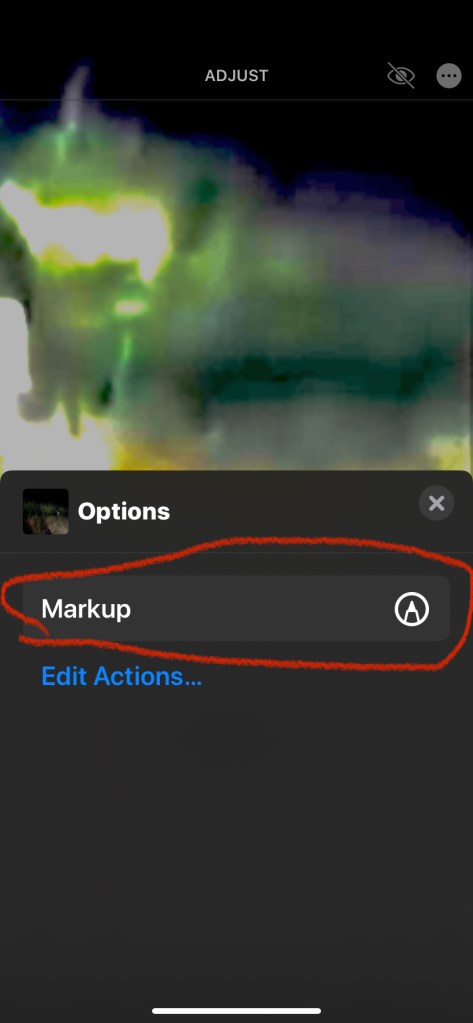
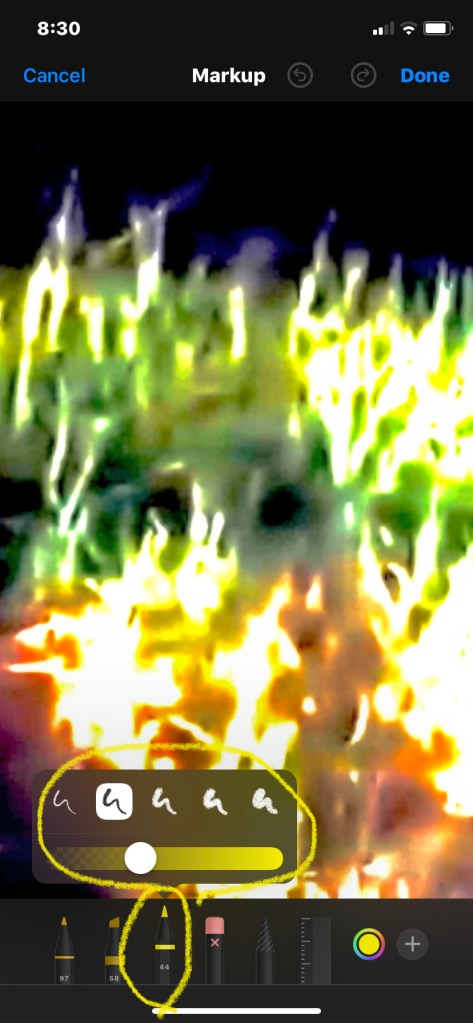
Finally, if I want to share what I found or highlight something I found to reference later, I go up to the top right corner of the screen to the little circle with the three dots. That brings up the “Options” function. Go to the “Mark Up” with the pen tip in the circle and tap it. That brings up the image and a line of pens at the bottom of the screen. The ones most useful to me are the pen third in from the left and the eraser pen beside it on the right. Tap on the pen and it will move up a little to show it’s selected. If you want to change the color, then tap on the little circle with color in the middle with a rainbow perimeter. Tap on that and a block of color choices appears. The very top will be a gray scale and then an entire color palette. Tap on the color you like and the pen will change to that color. If you haven’t selected your pen first, the color will not change.
When you tapped on the drawing pen, a little slider bar menu appears and sliding it back and forth will make the drawing line thicker or thinner when you draw with it. How bold you want to make it depends on what you want to highlight. There is even a “Highlighter” pen to the left of the drawing pen that you can also repeat the same steps to change the color. The pen all the way to the left is for fine writing.


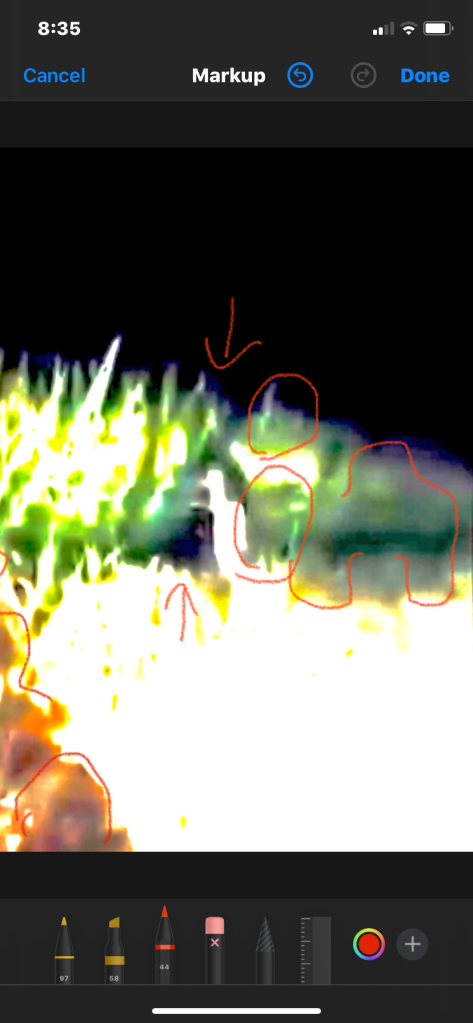
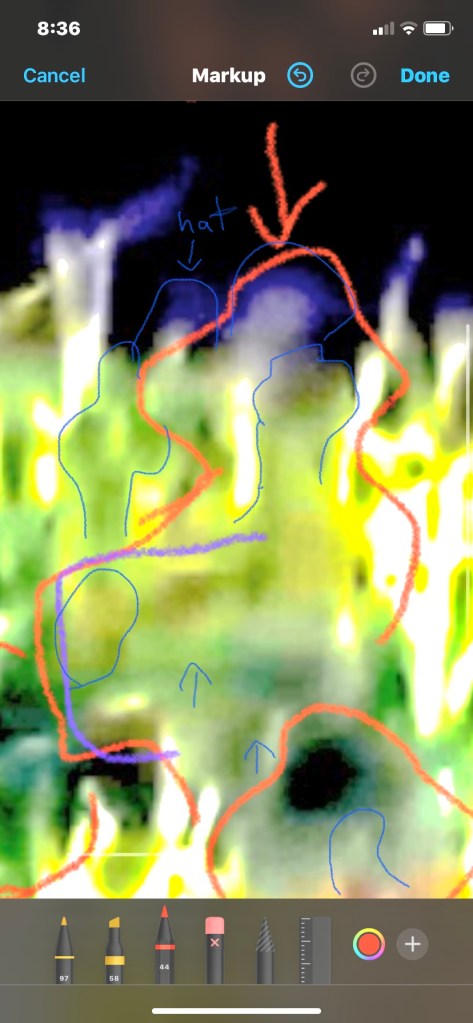
I use my finger to draw arrows to point out creepers or to draw an outline around a subject of interest. I will often change the color of the pen to show different attributes such as red for creepers, blue for portals, yellow for something else interesting. I will even spell out words like “hat” or a “P” for portal. Many people have trouble seeing the creepers, so I tell them to look for the top hat first so that their eyes can adjust to their presence as they rarely have highly defined features. In fact, when an entity is clear and detailed, that’s when I suspect a Photoshop hoax, er, art project. Creepers with hats are so hidden in the normal light of day in images, I find it highly unlikely that anyone would put that much work into adding hidden creepers that most people won’t even think to expose by enhancing the exposure filters.The only other function I’ve used is the eraser pen in the middle. Tap on it and you may erase any line drawing mistakes and then go back to the drawing pen, if needed. Once you’ve finished, hit the blue “Done” button on the upper right of the screen and you’ll return to the adjustment functions. Be careful because I’ve found that many times, once I’ve hit “Done,” I can no longer go back and erase any drawing mistakes unless I want to start completely over from where I started with the original screenshot.

Hitting the yellow “Done” at the bottom right of the screen in the adjustment page will finish your work! You can revert the image back to its original form if you hit the “Edit” button after you’ve hit the yellow “Done” button. Just hit the red “Revert” button that appears at the bottom right of the screen after you hit “Edit.” Take a screenshot or otherwise save/copy the final image if you want to continue with more editing and analysis.
That’s the long and skinny of what I began doing when I became interested in paranormality about a year ago. I wasn’t looking to find entities and manifestations, I was actually trying to debunk, or otherwise rationally explain, poltergeist activity. Where there are poltergeists, there are creepers, in almost every single video I’ve seen. I then began to look at orbs to see if they were bugs, dust or water droplets as these have distinct qualities that appear when the brilliance is pulled. To my surprise, I didn’t see strands of hair or particles; legs, wings or antennae; or the concentric circles of moisture droplets. I saw faces and I saw a lot of hat man creepers more often than not, both inside the orb and appearing to hitchhike and hug the light energy as it moved through the air. I also noticed that I rarely saw these creepers manifested below the waist, most usually only showing shoulders, arms, head and the ubiquitous top hat, although not always a top hat. If there is a reflective surface in a room, like a mirror, there are usually hat men manifesting within it. They can show up as totally black figures to intensely bright or just vague outlines reaching through the pixels that are not pareidolia. I will address matrixing and pareidolia in a separate post.
“Then away out in the woods I heard that kind of a sound that a ghost makes when it wants to tell about something that’s on its mind and can’t make itself understood, and so can’t rest easy in its grave, and has to go about that way every night grieving.” —Mark Twain
